From another thread:
Plano tips:
I find that no matter how much you rush to get things done, it won't make you set that much faster. It's about how you prepare and plan it. Go to online Planogram on workbench or use the zebra to see the pog by typing or selecting your pog. Then, view images or pog pages.
Here are some tips if you haven't been taught this already. Some are fairly obvious, but just in case.
- Prepare before you start setting. Get all your labels and strips. Take a good look at your plano and plan your attack, what fixtures do I need? do I need backer paper? will it be easier to set 1 section at a time or all at once? Look at the cover sheet, it gives you info on what fixture you need and how many. If you look at the quantity, it may say +3, that means you need 3 more pegs and the rest that's already on that aisle can be reused)
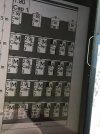
- Try not to count the holes at first for peg height. Use your measuring tape. Each hole is exactly 1" apart. ex. from base shelf to top hole = 76" and where top and bottom back paper meets, it's always 36" (except endcaps = 34"). You can mark your tape measure to even find the letters, like the pic below.
- For revisions, you gotta decide what will be quicker. If there's 2-5 pegged items changing, just fix those and leave the rest of the stuff around it. If it's like 10+ pegs, or the old set is all messed up and zone is terrible, it might actually be quicker to take it all down and start from scratch. Don't clean too much unless it's really bad. Dust and move on.
- When doing a whole aisle or multiple sections, try to do a certain tasks all at once. Here's an example of my process.
1. Demerchandise everything. Don't organize it too much, just throw the sucker in a cart/repack box.
2. Remove unnecessary fixtures and add any that's required. Then remove old labels and strips. (you don't want to clean before this step, because why clean a shelf if you end up not using it?)
3. Put up any backer paper.
3. Set all the strips.
4. Adjust shelf height based on what the strips say using a measuring tape, don't look at the planogram for this info.
5. Set the pegs. (try to count based on previous pegs set or pegs around it. ex. if a peg on the left is at 'K', start count from there.
6. Put up all the labels.
7. Clean, having a duster is quick if using liquid solution isn't necessary. Don't go gung ho and try to clean every nook and cranny.
8. Put up any signing or have your signing tm do it.
9. Push the merch that you've took down.
10. Push batch like your momma just gave birth.
Your still fairly new to setting, so you shouldn't beat yourself up. I trained a few new plano tms and usually start off fairly slow, even after a few months. I find they struggle a lot at counting because there's so many pegs and figuring out how new fixtures/or fixtures they've never used before--are suppose to be set. If you have time, try to familiarize with all the different fixture. Once you've gained that experience and find what process work best for you, setting plano should be a lot quicker.
Please note, you might have to pull & backstock your products, too.
Thanks Tesla